Page 1 of 1: DVD to Ogm Conversion Guide
Ogm is an alternative audio/video storage format to the popular AVI format, allowing more advanced features such as built-in chapter points, subtitle(s) and multiple audio streams. Just like AVI, Ogm allows a variety of codecs to be used for audio and video compression, including the DivX/XviD codec.The biggest problem with the Ogm format right now is that it is relatively unknown (compared to AVI), probably due to the lack of any "big name" conversion tools (in the vein of FlasK, Gordian Knot, etc). Hopefully, this is about to change.
DVDtoOgm is a new DVD to Ogm conversion tool, designed to be familiar to users of Gordian Knot, and is compatible with both the DivX 5.x and XviD codec.
Below are instructions on how to convert your DVDs to a DivX 5.x or XviD Ogm file using DVDtoOgm.
Requirements :
 8 GB of free hard-disk space.
Software Downloads :
 DVDtoOgm (and related required software : Ogg Vorbis Direct Show Filters, Ogg subtitle filter)
 DivX or XviD codec
Summary of procedures :
- Installing DVDtoOgm - Instructions on installing all the required software for DVDtoOgm;
- DVDtoOgm Basic Setup - Setting up basic DVDtoOgm settings to prepare for audio/video encoding;
- DVDtoOgm Advanced Setup - Setting up advanced DVDtoOgm settings, like chapters, subtitles;
- Video and Audio Encoding - Changing the audio and video encoding settings and starting the conversion.
Step 1 : Installing DVDtoOgm
- Install DVDtoOgm - DVDtoOgm is a large package that comes with many bundled software - you should leave the default installation alone, unless you know what you are doing.
- In the current version of DVDtoOgm, you have to separately install the Ogg Vorbis DirectShow and Ogg subtitle filters.
- If you have never used VirtualDub/VirtualDubMod before, you need to manually locate the "VirtualDubMod.exe" from where you installed DVDtoOgm and run it.
- Also make sure you have successfully installed the DivX or XviD codec, depending on which codec you would like to use for the video compression.
Step 3 : DVDtoOgm Basic Setup
- We'll now setup DVDtoOgm with the basic settings needed prior to starting the actual conversion. Basic setup includes creating the DVD2AVI project file, bit-rate calculations and audio/video setup. Please note that the next step, DVDtoOgm Advanced Setup, will cover the advanced features of DVDtoOgm (and the Ogm) format, like chapters, subtitles ...
- Start DVDtoOgm.
- We'll now make a DVD2AVI project file. Still in the "Prepare" section, click on the "DVD2AVI" button to start DVD2AVI. Please follow this DVD2AVI guide to find out how to make a DVD2AVI project file (and also an .AC3 file for the audio component of the clip). Also take a note of the "Statistics Window" results you get when playing back the movie in DVD2AVI - the properties you should remember are "Aspect Ratio", "Video Type" and "Frame Type". You can close DVD2AVI after you have finished saving the project file.
If you've used DVD2AVI before and are planning on converting an entire file/movie, then you can do all the DVD2AVI processing within DVDtoOgm itself, since it provides an interface for DVD2AVI in the "Prepare" tab. You should also leave the "Bitrate calculation" and "Use Info in the Audio tab" options.
Important #1 : Take a note of the "Statistics Window" results you get when playing back the movie in DVD2AVI (using the "F5" key - see DVD2AVI guide for more information) - the properties you should remember are "Aspect Ratio", "Video Type" and "Frame Type".
 For a detailed explanation of DVD2AVI Project File Creation, please refer to our DVD2AVI Project File Creation Guide

 DVDtoOgm - Prepare : Project File
- Now go to the "Bitrate" section by clicking on the "Bitrate" tab. Click on the "Load" button under the "Load Source" section and load in the DVD2AVI project file you created in the last step.

 DVDtoOgm - Bitrate : Load Source
- The "Bitrate" section allows you to tell DVDtoOgm the final file size of your conversion. By giving DVDtoOgm as much known information (such as the number of audio streams, bitrates you plan to use and final file size of your conversion) as possible, DVDtoOgm will do all the hard work for you and modify the settings of the audio/video codec, to ensure the final file size is met. The information you need to give DVDtoOgm are :
- Duration : This tells how long the clip you are trying to convert is. DVDtoOgm should be able to retrieve this information from the DVD2AVI project file it just loaded, so normally, you don't need to make any changes here.
- Audio 1 ... n : These settings tell DVDtoOgm the bit-rate you plan to use for audio encoding, for each audio stream. Select either "Ogg" or "Mp3" audio, depending on which you plan to use. Now select the bit-rate you plan to use, and DVDtoOgm should display the estimated size of the audio track in the area below. Note that this doesn't actually set the audio bit-rate, but rather, tells DVDtoOgm about the bit-rate so it can work out how to encode your clip to match the final output file size (specified below). You can also use the "Select" button to load an already encoded file, if that's what you plan to use.
Repeat the above for Audio 2 ... n if you have two or more audio streams.
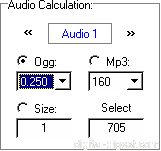
 DVDtoOgm - Bitrate : Ogg Setup
- Framerate : This is the framerate of the clip you are trying to convert. Again, DVDtoOgm should be able to retrieve this information from the DVD2AVI project file.
- Add Files : Use the "Add" button to add any additional files (eg. subtitles, chapters) files you plan to include in the final Ogm file. Note that this doesn't actually load in these files, but rather, tells DVDtoOgm about these files so it can work out how to encode your clip to match the final output file size (specified below).
- Final File Size : Use the "1 CD = " input box and the "1, 2, 3 CDs" buttons to specify how large the output file should be and how many CDs it should span. Alternatively, you can also specify the "Total File Size" instead to specify the final output size of the movie. Note that selecting multiple "CDs" will not make DVDtoOgm split the output Ogm file for you - you need to do this manually.
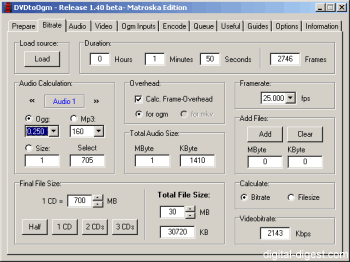
 DVDtoOgm - Bitrate
- Duration : This tells how long the clip you are trying to convert is. DVDtoOgm should be able to retrieve this information from the DVD2AVI project file it just loaded, so normally, you don't need to make any changes here.
- Now go to the "Video" section by clicking on the "Video" tab. This section allows you to set the final video resolution and also crop the video, if necessary. It is here that you need to recall some of the properties of the clip you are trying to convert that DVD2AVI was able to provide (see Important #1).
- Recall the "Video Type" property of your source clip (see Important #1), and change the "Input Resolution" setting to match this property.
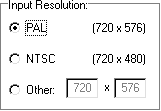
 DVDtoOgm - Video : Input Resolution
- Recall the "Aspect Ratio" property of your source clip (see Important #1), and change the "Input Aspect Ratio" setting to match this property.

 DVDtoOgm - Video : Input Aspect Ratio
- DVDtoOgm now features smart cropping, which makes it much easier to crop your video (smart cropping will analyse your video, and crop for you automatically based on where it detects a black border). Press the "Smart Crop All" button to crop the video.
- Alternatively, you can use the "Auto Crop" options to crop the video.

 DVDtoOgm - Video : Auto Crop
The options exaplained :- Don't crop the Picture - Often, movies will have a small (1 to 2 pixel) black area that is actually part of the movie. When this option is selected, this black area will be kept in the movie.
- Don't let black Borders - This does the opposite to the above, and will ensure that all black areas are removed, leaving the picture only.
- Delete cropping Values - This option will delete any existing cropping values
- Don't crop the Picture - Often, movies will have a small (1 to 2 pixel) black area that is actually part of the movie. When this option is selected, this black area will be kept in the movie.
- Click on the "Show output" button and a new "Crop & Preview" window should be opened. This window allows you to see the result of the cropping. Make sure everything looks right in the preview window then close the "Crop & Preview" window.
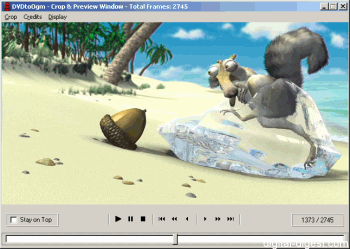
 DVDtoOgm - Video : Cropped Video
- DVDtoOgm allows you to save your selected settings, so that you can use them the next time you encode a clip. To save your current settings as a profile for use the next time, click on the "Useful" tab to go to the "Useful" section. In the "Save Settings" area, click on the "Rename" button and type in a new name for the profile you wish to save - then press the "Rename" button again to finish the renaming. Press the "Save" button to save the profile.

 DVDtoOgm - Useful : Save Settings
Step 3 : DVDtoOgm Advanced Setup
-
This section is still incomplete in this version of the guide. In future versions of the guide, advanced options like adding chapters, subtitles and multiple audio streams will be discussed in this step.
Step 4 : Video and Audio Encoding
- We'll now proceed to setup the options for video and audio encoding, and start the actual conversion process.
- First, go to the "Audio" section by clicking on the "Audio" tab. The interface has greatly changed since the last version, but the idea is the same. First load in the .AC3 file that DVD2AVI created by pressing on the "Add" button at the top of the screen.
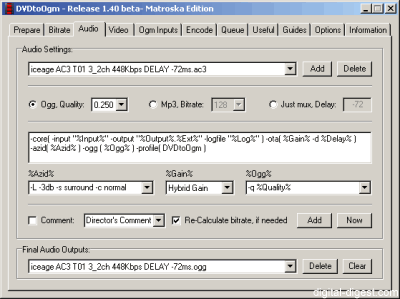
 DVDtoOgm - Audio
- Now choose either "Ogg" or "MP3", depending on what format you want to encode to, or multiplexing the original AC3 to the output file using the "Just mux" option. It should match whatever audio format you selected in the "Bitrate" section.
- The next sections specify the BeSweet audio conversion options. If you don't know much about BeSweet, then leave these settings alone.
- The "Comments" section allow you to add a text comment for a particular audio track - this helps if you have lots of audio tracks (eg. one for each language).
- Once you have finished, you can press the "Add" button next to the "Re-calculate bitrate, if needed" option (which should be selected by default). Pressing this button adds all of the above audio settings to the list of audio tracks listed in the "Final Audio Outputs" drop down list. You can now proceed to add other audio tracks to this list by repeating the above instructions for each audio track.
- Now go to the "Encode" section by clicking on the "Encode" tab. Here is where we configure the video compression settings, for either the DivX Pro 5.x codec or the XviD codec.
- If you resized the video in "Step 2 : DVDtoOgm Basic Setup", then you'll have to specify a Resizefilter. The available options are :
- Lanczos : This resize option produces a very sharp picture. It is not suited for low bit-rate encodings, as the sharper the picture, the more bit-rate it will need.
- Sharp/Neutral/Soft Bicubic : Bicubic resize gives a much better looking image when resizing up, rather than resizing down, since it may produce jagged edges. The three different types of bicubic resize offers different levels of picture sharpness. Neutral Bicubic is a general well-rounded value to choose in most situations.
- Bilinear : Bilinear resize tend to work better with resizing down, since it makes the picture too soft and blurry.
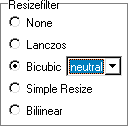
 DVDtoOgm - Encode : Resizefilter
- Lanczos : This resize option produces a very sharp picture. It is not suited for low bit-rate encodings, as the sharper the picture, the more bit-rate it will need.
- If your source is noisy (shouldn't be the case with a DVD source) you can select to use a noise filter.
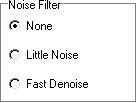
 DVDtoOgm - Encode : Noise Filter
- New in DVDtoOgm 1.40 is de-interlacing options (Field Options). There are three different kind of de-interlacing you can select (similar to the options in GordianKnot). If you can remember back to when you saved the DVD2AVI project, the "Frame Type" that I reminded you to remember earlier on becomes important here. If the "Frame Type" is "Interlaced", then you need to enable one of these de-interlacing options. Field deinterlace is slower, but produces better quality output.
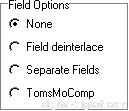
 DVDtoOgm - Encode : Field Options
- You can also select "Convolution 3D" setting. Think of Convolution 3D as an anti-noise filter that takes into account spatial and temporal noise elements. Selecting this option can can improve compressibility (lower noise => less details => higher compressibility). Note : this option may not be fully functional in the 1.20 Alpha version of DVDtoOgm.
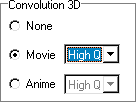
 DVDtoOgm - Encode : Convolution 3D
- Recall the "Video Type" properties of your source clip (see Important #1). If your video type was "FILM for less than 90% or is NTSC", then you need to select the "Telecide & Decimate" option.

 DVDtoOgm - Encode : IVCT
- Depending on which codec (DivX or XviD, or the newly supported 3ivX) you want to use, select the appropriate option under the "Video Codec" area. This should bring up a list of options for each respective codec.

 DVDtoOgm - Encode : Video Codec
In the "Pass Setting" section, you can choose the number of encoding passes you want to perform (more information on what encoding passes are can be found in the codec documentations linked below). Choose "Single Pass" to perform a single pass encoding. Choose "First Pass" or "Nth Pass" if you are only interested in encoding one particular pass. Choose "Multi Passes" or "Both Passes" to encode all the passes in one go (this is the option that you will normally select).
 For a detailed explanation of DivX Pro 5.x first/second pass options, please refer to our DivX Pro 5.x Setup Guide
 For a detailed explanation of XviD first/second pass options, please refer to our XviD Setup Guide
- New in DVDtoOgm 1.40 is compressibility checking. Similar to the option in GordianKnot, compressibility checking encodes a small part of the video file and make sure your settings are optimal. Here, you can select the how much of the video you should perform the check on (5% is the default, and should be fine for most movies), the codec settings to perform the check on and Avisynth options. Normally, just leave these settings alone and press the "Start" button to start the compressibility check.

 DVDtoOgm - Encode : Compressibility Checking
After a short while, the compressibility checking should be finished. The result of the check is shown in the "Video" tab section, under the "Info" section.

 DVDtoOgm - Video : Compressibility Checking
A percentage rating of between 60% and 80% is optimal - anything lower means the bit-rate is insufficient and that you should increase the output file size or decrease the resolution. Do the opposite if the percentage rating is above 80%.
- Now would be a good time to save your settings again (Useful tab).

 DVDtoOgm - Useful : Save Settings
- When you have finished setting up the codec settings, click on the "Save + Encode" button (in the "Encode" tab section) and find a location to save the .AVS file DVDtoOgm generates. This .AVS file contains all the settings you have selected so far, and will be used during the conversion process, so make sure you don't delete or move this file during conversion.
After you save the .AVS file, a new "Start Encoding?" window should pop up. Here, you can change the output directory of your final Ogm file, as well as these options :- Mux Audio and Video : This options specifies whether DVDtoOgm should join the separately encoded audio and video files into the final Ogm file. Unless you want two separate audio/video files, this option should be selected.
- Delete intermediate Files : This option specifies whether DVDtoOgm should delete temporary files that it generates during encoding. This option should be selected.
- Write Job-Logfile : This option specifies whether DVDtoOgm should write a log file for the conversion process.

 DVDtoOgm - Start Encoding : Options
The "Information" section tells you how much disk space you have left, and whether it is enough for the conversion process.
When you are ready to start the conversion, press the "Encode now" button.
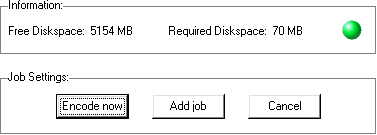
 DVDtoOgm - Start Encoding
- Mux Audio and Video : This options specifies whether DVDtoOgm should join the separately encoded audio and video files into the final Ogm file. Unless you want two separate audio/video files, this option should be selected.
- DVDtoOgm should start the conversion process, and after a while, your DVD will have been converted to Ogm format. You can check DVDtoOgm's Queue section to see how far along the conversion process is, and for any error messages.


